How to Trim Videos on Windows, Mac, Android, iPhone & Online: Best Ways Only
Learn all the most actionable ways to trim your own video and a video that isn’t yours.


Whether you’re creating YouTube Shorts, making TikToks and Reels, or editing long videos for repurposing, trimming a video is often necessary. Trimming the start and end of your video keeps it concise, engaging, and free of awkward pauses. By focusing only on the best parts, you can create tighter, more compelling content. This article covers how exactly to trim videos on Windows and Mac computers, as well as Android, iOS devices and even online.
How to Trim a YouTube Video Online with AI Video Cut
Let’s start with an online way powered by AI. AI Video Cut allows you to trim your own videos or any video from YouTube that isn’t yours. AI Video Cut is an online tool powered by OpenAI technology that quickly and easily cuts long videos into shorter chunks of video content. But the tool doesn’t do it randomly. Artificial intelligence processes one of the pre-made prompts and cuts videos into meaningful clips.
Follow these steps to trim a video with AI into several clips, based on the prompt:
Trailer for the Video
- Go to the AI Video Cut website.
- Copy and paste the link of a YouTube video into the designated field on the website or upload your own video. As of now, only videos not longer than 30 minutes can be trimmed this way.

- Choose the "Trailer" format to highlight the most engaging points of your video.
- Select the desired duration:
- Short (up to 7 quotes)
- Medium (up to 15 quotes)
- Long (up to 25 quotes)
- Click on the "Submit" button to start the processing of your video.
- Allow some time for the AI to process your video into the chosen format.
- Once processed, download your trailer directly from the website or via the link sent to your email.
- Watch the generated trailer on the website to ensure it meets your expectations. You can also utilize the provided transcript for captions or further editing needs.
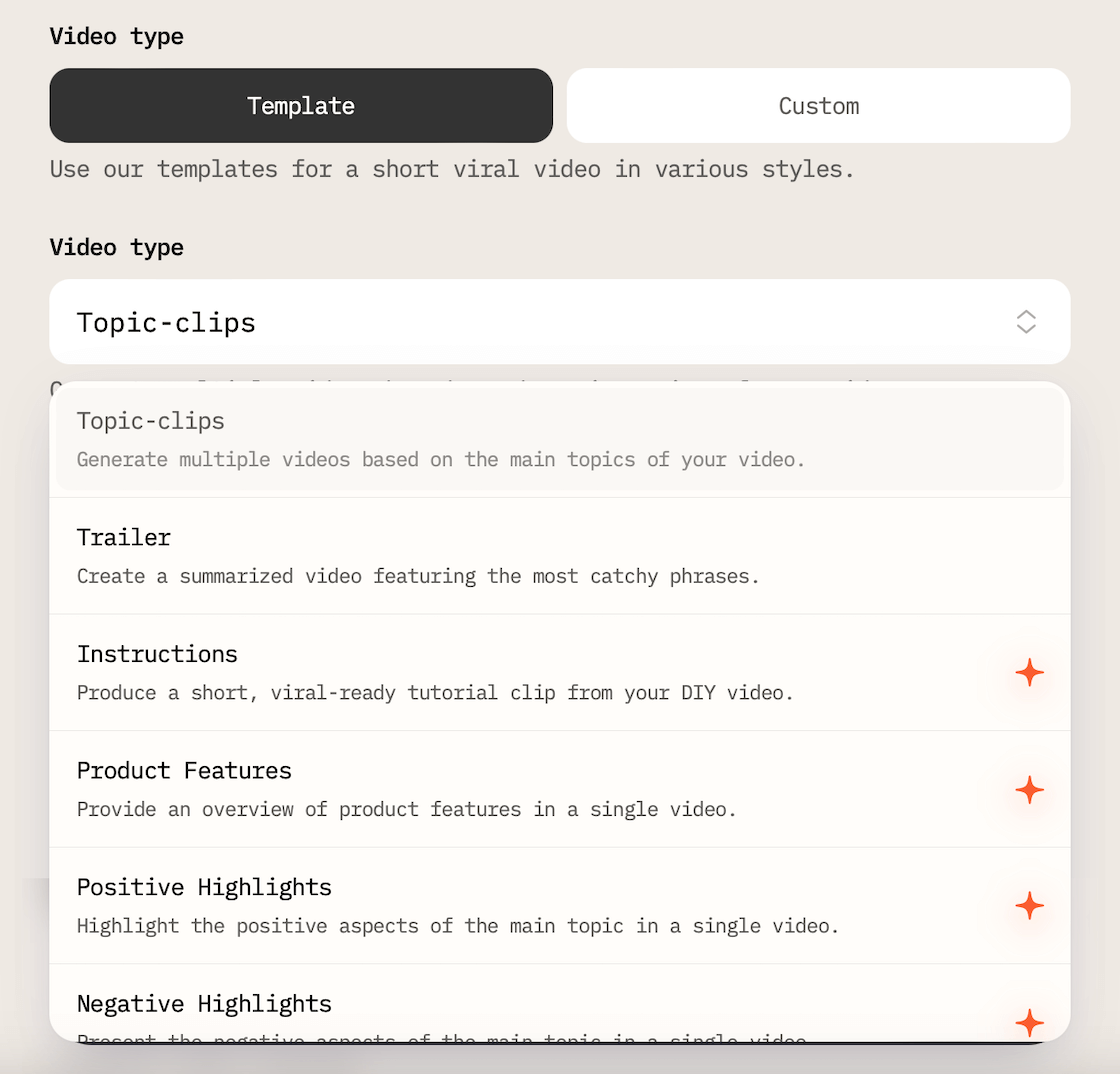
Topic Clips
- Go to the AI Video Cut website again to access the tool.
- Paste the link of your video into the input field.
- Opt for "Topic Clips" to highlight specific topics discussed in your video.
- Decide on:
- Duration (Short, Medium, or Long)
- Number of topics (from 1 to 10) you want to highlight.
- Click on the "Submit" button to initiate the processing.
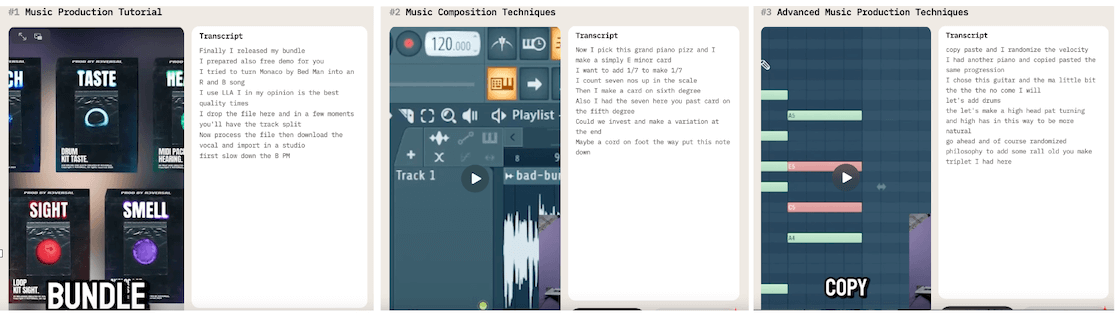
- Wait for the AI to process your video and generate clips based on the selected topics.
- Once processed, download one or several suggested clips directly from the website or through the links provided in your email.
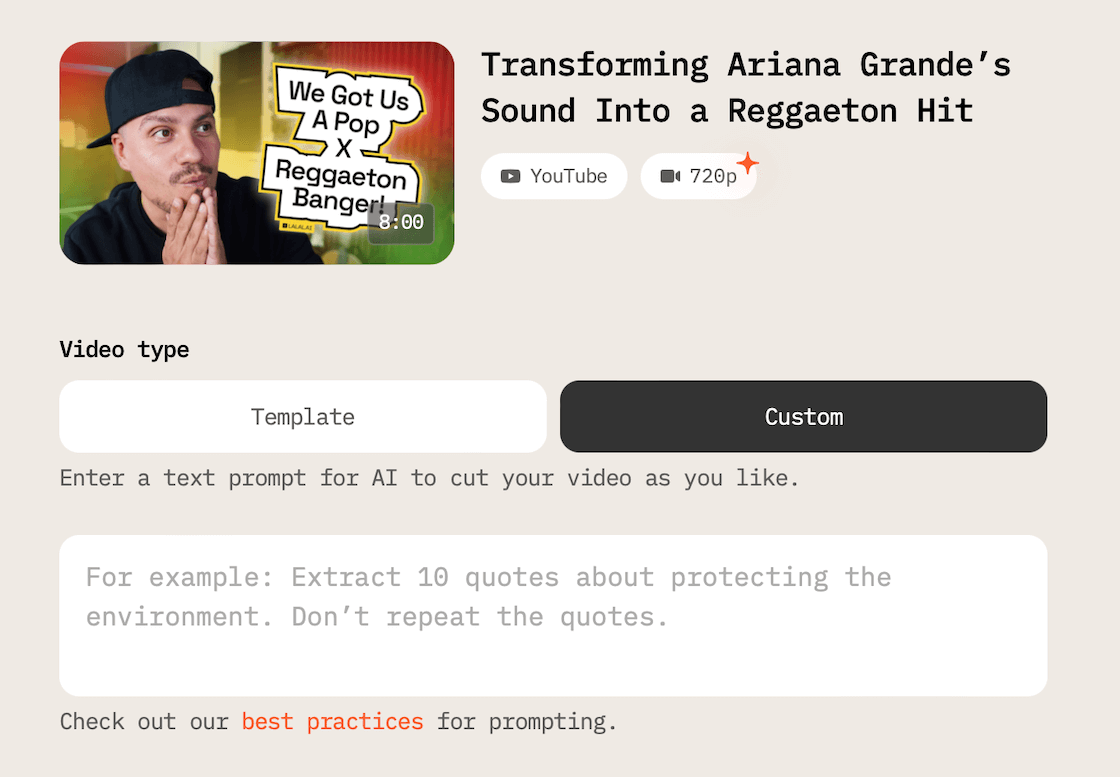
Apart from these two prompts, AI Video Cut can generate short videos from your longer video guides, product reviews, courses, presentations, and other formats with tailored prompts, designed for specific use cases. Or you simply can choose the Custom option and create your own prompt that perfectly aligns with your original video and the short clip you want to turn it into.
With AI Video Cut, you can efficiently repurpose your existing video content into compelling YouTube Shorts, TikToks, and Reels to maximize the reach of your original video material and attract viewers interested in specific topics covered in your videos.
How to Trim a Video on a Windows PC with the Photos App
Another way of getting the job done is trimming a video on a Windows PC is straightforward with the built-in Photos app. Here’s how to do it:
- From your desktop, click the Start menu and open the Photos app.
- Click on the video you want to edit to open it.
- Select the ‘Edit & Create’ button, which has a scissors icon in the top right corner, and choose ‘Trim’ from the drop-down menu.
- You’ll see white pins on the right and left sides of your video’s timeline. Drag these pins to set where you want the footage to start and end. Use the blue pin to play through the footage and ensure you’re trimming the correct section.
- Click the ‘Save a copy’ button in the top-right corner to save the trimmed video. The original file will remain unchanged.
How to Trim a Video on Windows 10 Using VLC
VLC Media Player is a versatile tool that supports various audio and video formats. In addition to playing media files, it offers essential editing capabilities like cropping, converting, merging, and rotating. Here's how to trim a video using VLC:
- Download and install VLC Media Player on your computer if you haven't already.
- Launch VLC and click on Media > Open File at the top to import the video you want to trim.
- Go to the View menu and select Advanced Controls to enable additional editing tools.
- Play the video and navigate to the starting point of the segment you want to keep, then pause the video. Click the Record button and then the Play button to start recording the desired segment.
- Click the Record button again to stop recording when you reach the end of the segment you want to keep. The trimmed video will be saved as an MP4 file in your Libraries/Videos folder.
You can also trim a video with VLC on Mac.
How to Trim a Video on a Mac or iOS Device with iMovie
iMovie, pre-installed on MacOS computers and most iOS devices, is a user-friendly tool for trimming videos. Here’s how to trim a video using iMovie on both Mac and iOS devices:
Trimming a Video in iMovie on Mac
- Launch the iMovie app on your Mac.
- Click on File and then Import Media to upload the video you want to trim. Alternatively, drag and drop the video into the editing panel.
- The video timeline will appear in the editing panel. Use the white vertical line to scrub through the video and find the points you want to edit. Press the Space bar to start and stop playback.
- Trim the Timeline:
- To shorten the video, drag the edges of the timeline.
- To trim a part in the middle, place the white line at the desired point and either click the scissors icon in the bottom left corner or press Command (⌘) + B to split the video into two parts.
- Select the part of the video you want to remove and press the Delete key.
- Press the Space bar to review the trimmed video. If you’re satisfied with the edits, save the video.
Trimming a Video in iMovie on iOS
Trimming a video in iMovie on an iPhone or iPad is simple and efficient. Follow these steps:
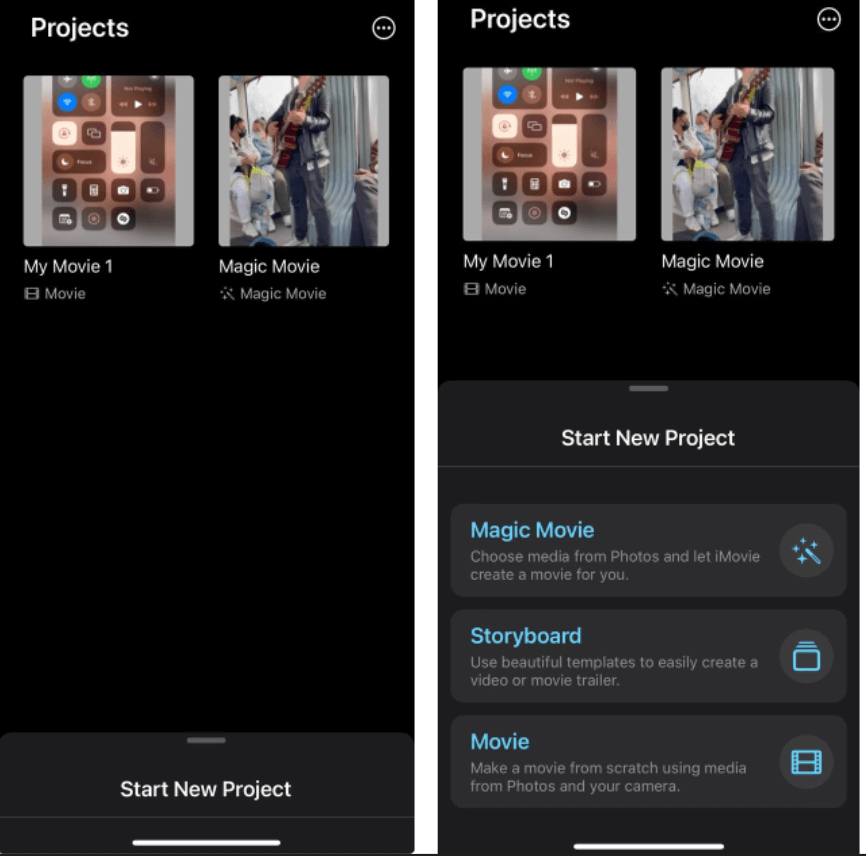
- Launch the iMovie app on your iOS device.
- Tap on Start New Project and select the Movie option. From your camera roll, choose the video you want to edit and upload it to the app.
- The video will appear in the timeline. Tap the timeline, and sliders will appear at both ends of the video. Drag these sliders to select the portion of the video you want to keep.
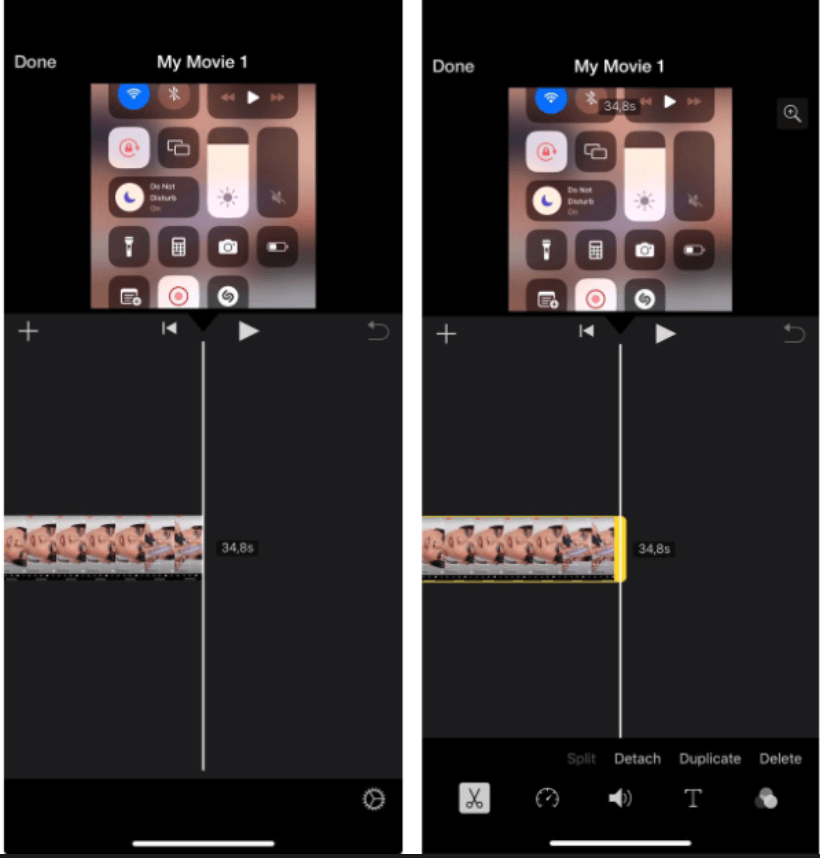
- Tap Done to complete the trimming process.
- Preview your new video. Decide whether to save it or continue editing. Use the share button to send the video to others if needed.
How to Trim a Video on Mac with QuickTime Player
Trimming a video on a Mac is easy with QuickTime Player, the native video editing tool. Follow these steps:
- Launch the QuickTime Player app on your Mac and open the video you want to trim.
- Go to the Edit menu and choose Trim.
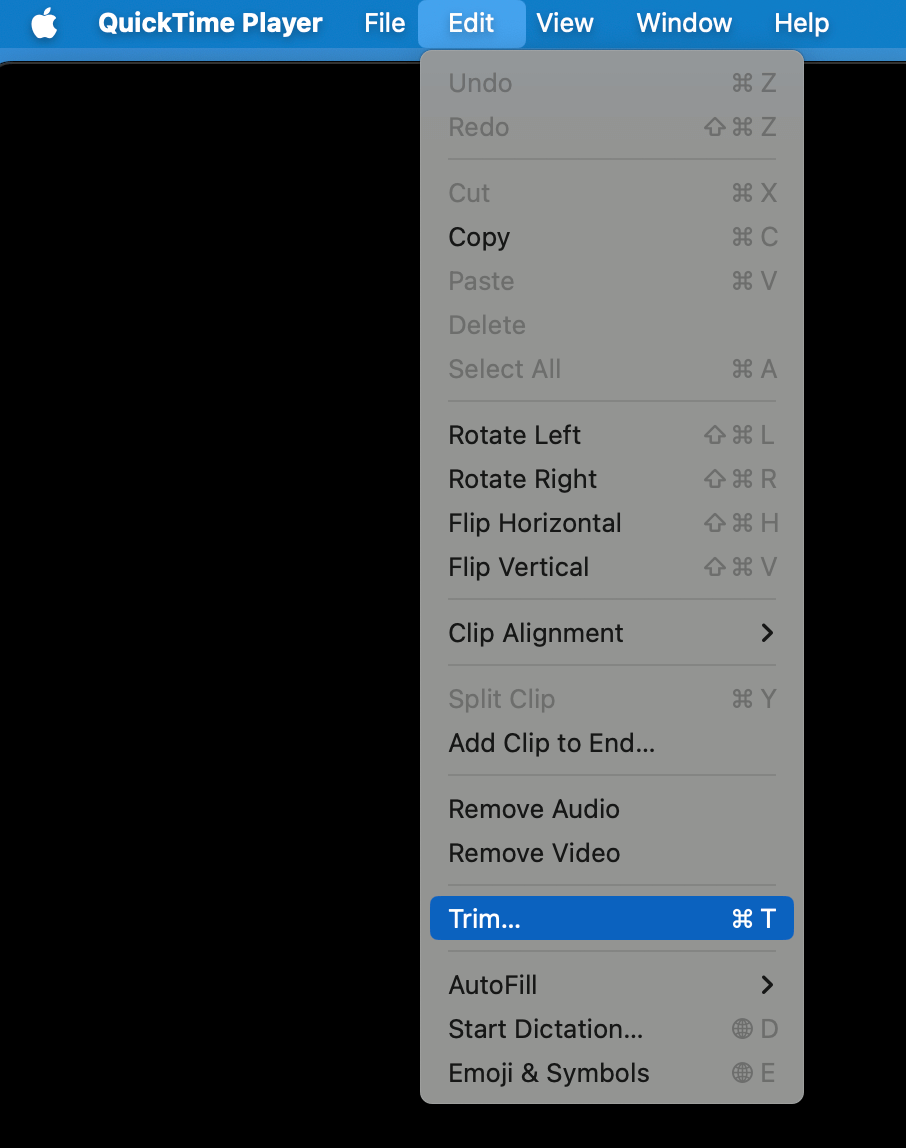
- A yellow trimming bar will appear at the bottom of your video. Drag the handles on the trimming bar to set the start and end points of the video. The portions outside the yellow handles will be trimmed.

- Once you have the desired length, click the Trim button to finalize the edit.
How to Trim a Video on Android Devices
Trimming a video on an Android device is also pretty straightforward using the pre-installed Gallery app. Here’s a step-by-step guide:
- Launch the Google Gallery app on your Android device, where you can view your photos and videos.
- Find and tap on the video that you want to trim.
- Tap on the pen icon labeled ‘Edit’ at the bottom of your screen.
- Handles will appear at the beginning and end of the video. Drag these handles inward to trim the video to the desired section.
- Tap the play button in the middle of the video to review the trimmed footage and ensure it meets your expectations.
- Tap ‘Save copy’ located in the top-right corner to save the trimmed version of your video. Note that the original video will remain on your device unless you delete it.
Bonus: Difference Between Trimming and Cropping Videos
In video editing, various techniques serve distinct purposes to enhance your content, with trimming being only one of them. There’s also cropping, splitting, and other tools, but let’s see how trimming and cropping are different because these two might often be used interchangeably.
Trimming involves cutting off the beginning and/or end of a video clip. It aims to shorten the video, making the introduction and conclusion quicker-paced. This helps in keeping the audience engaged by focusing on essential content. Trimming reduces unnecessary footage and refines the pacing of the video.
Cropping focuses on removing unwanted parts around the edges of the video frame. It eliminates black bars, unwanted backgrounds, or edges to zoom in on the main subject of the video. Cropping enhances the visual composition by centering attention on the subject, improving the overall presentation without altering the pacing.